
- Nov 9, 2024
Three Tips to make Canning Easier
- Erin Oberlander
- Modern Homesteading
- 0 comments
My, my, many of us have grown gardens this year who never have before, and the rest of us that have had gardens in the past have likely made them bigger. What does this mean?! Fruitfulness! Abundance! And the need to preserve that which you can’t use or share.
I have been canning for most of my life (it used to be one of my chores starting in Junior High), and I have made a LOT of mistakes, and I have learned a lot along the way about how to make canning easier.
Therefore, to make your canning projects go more smoothly, today I am going to share with you three tips to make canning easier—Timing, Tools, and Triangle.
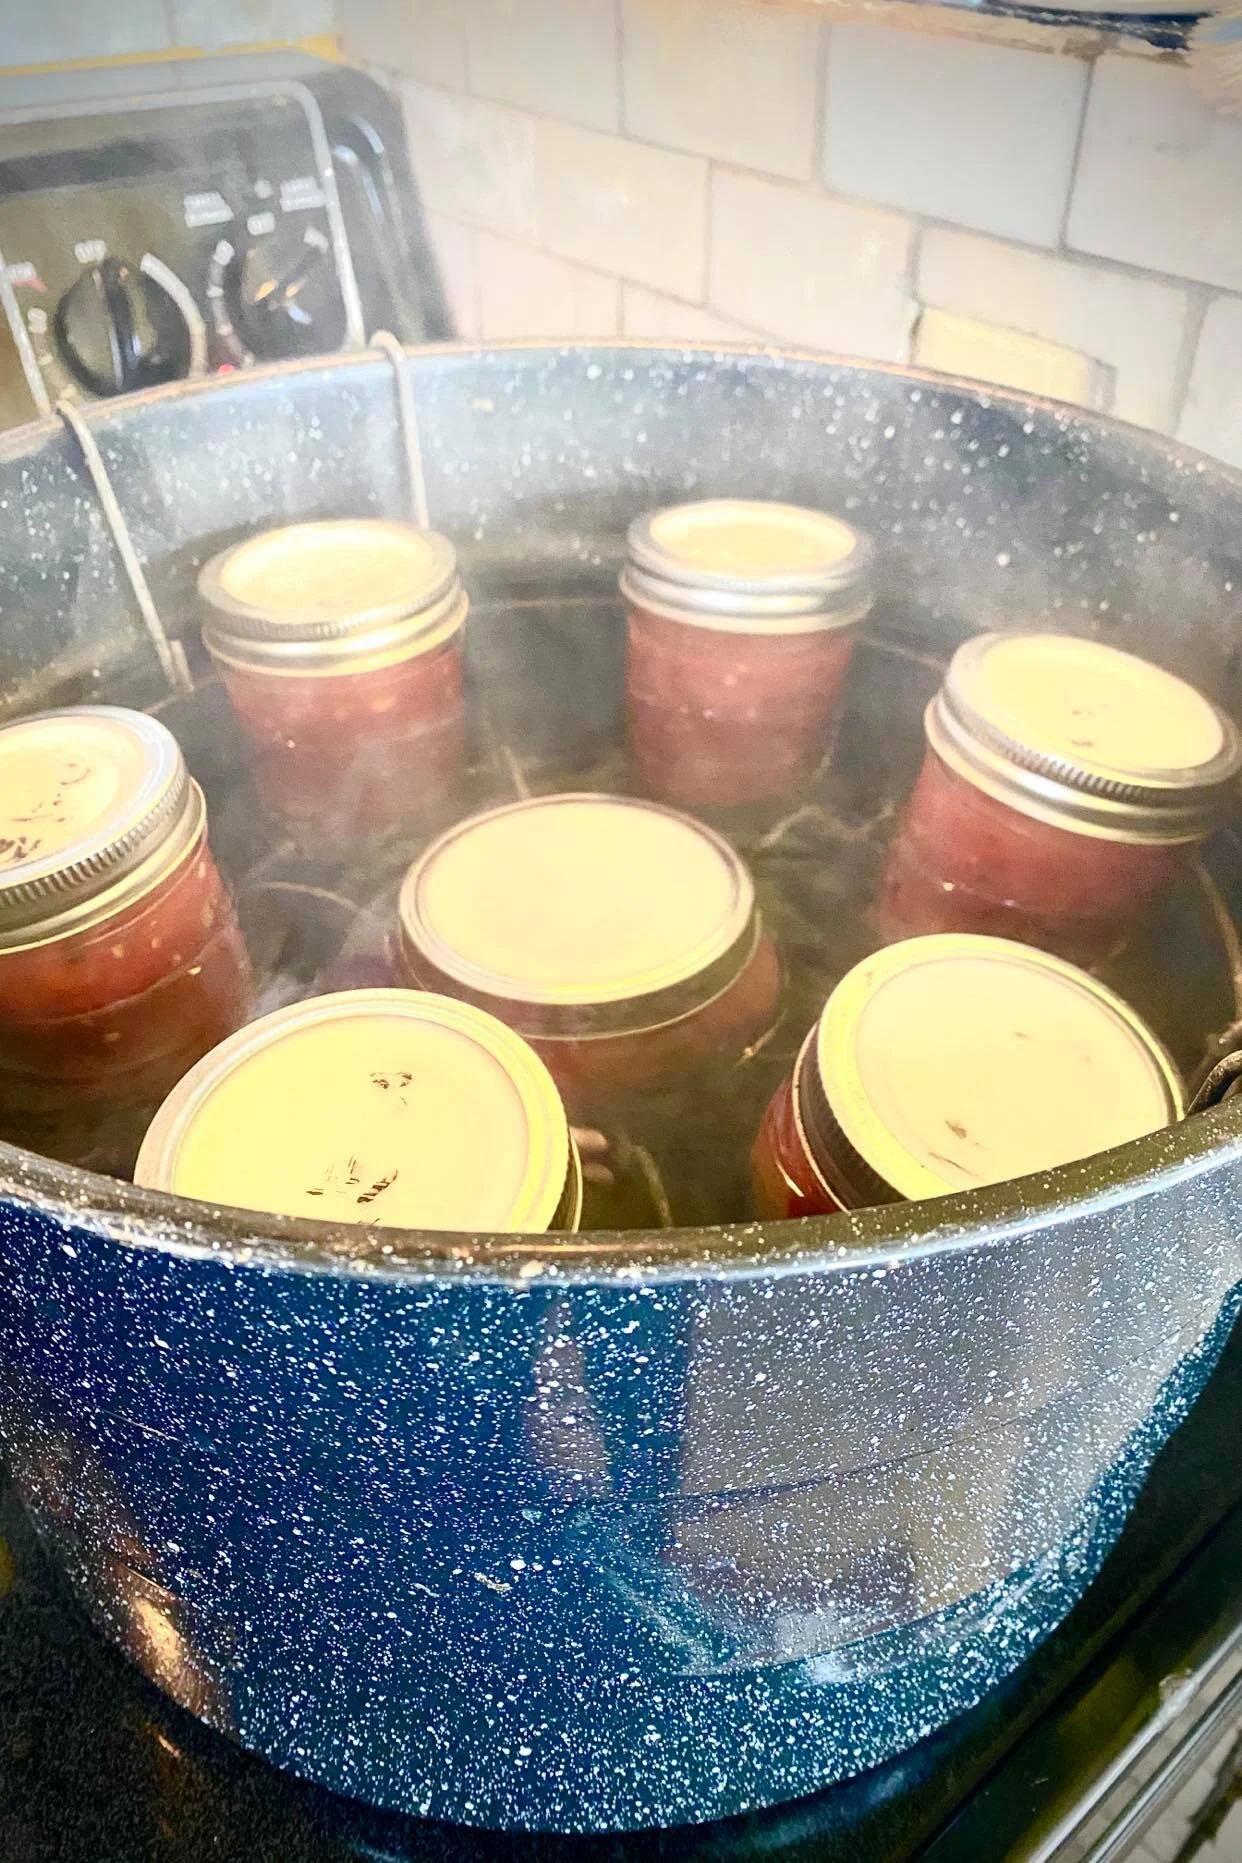
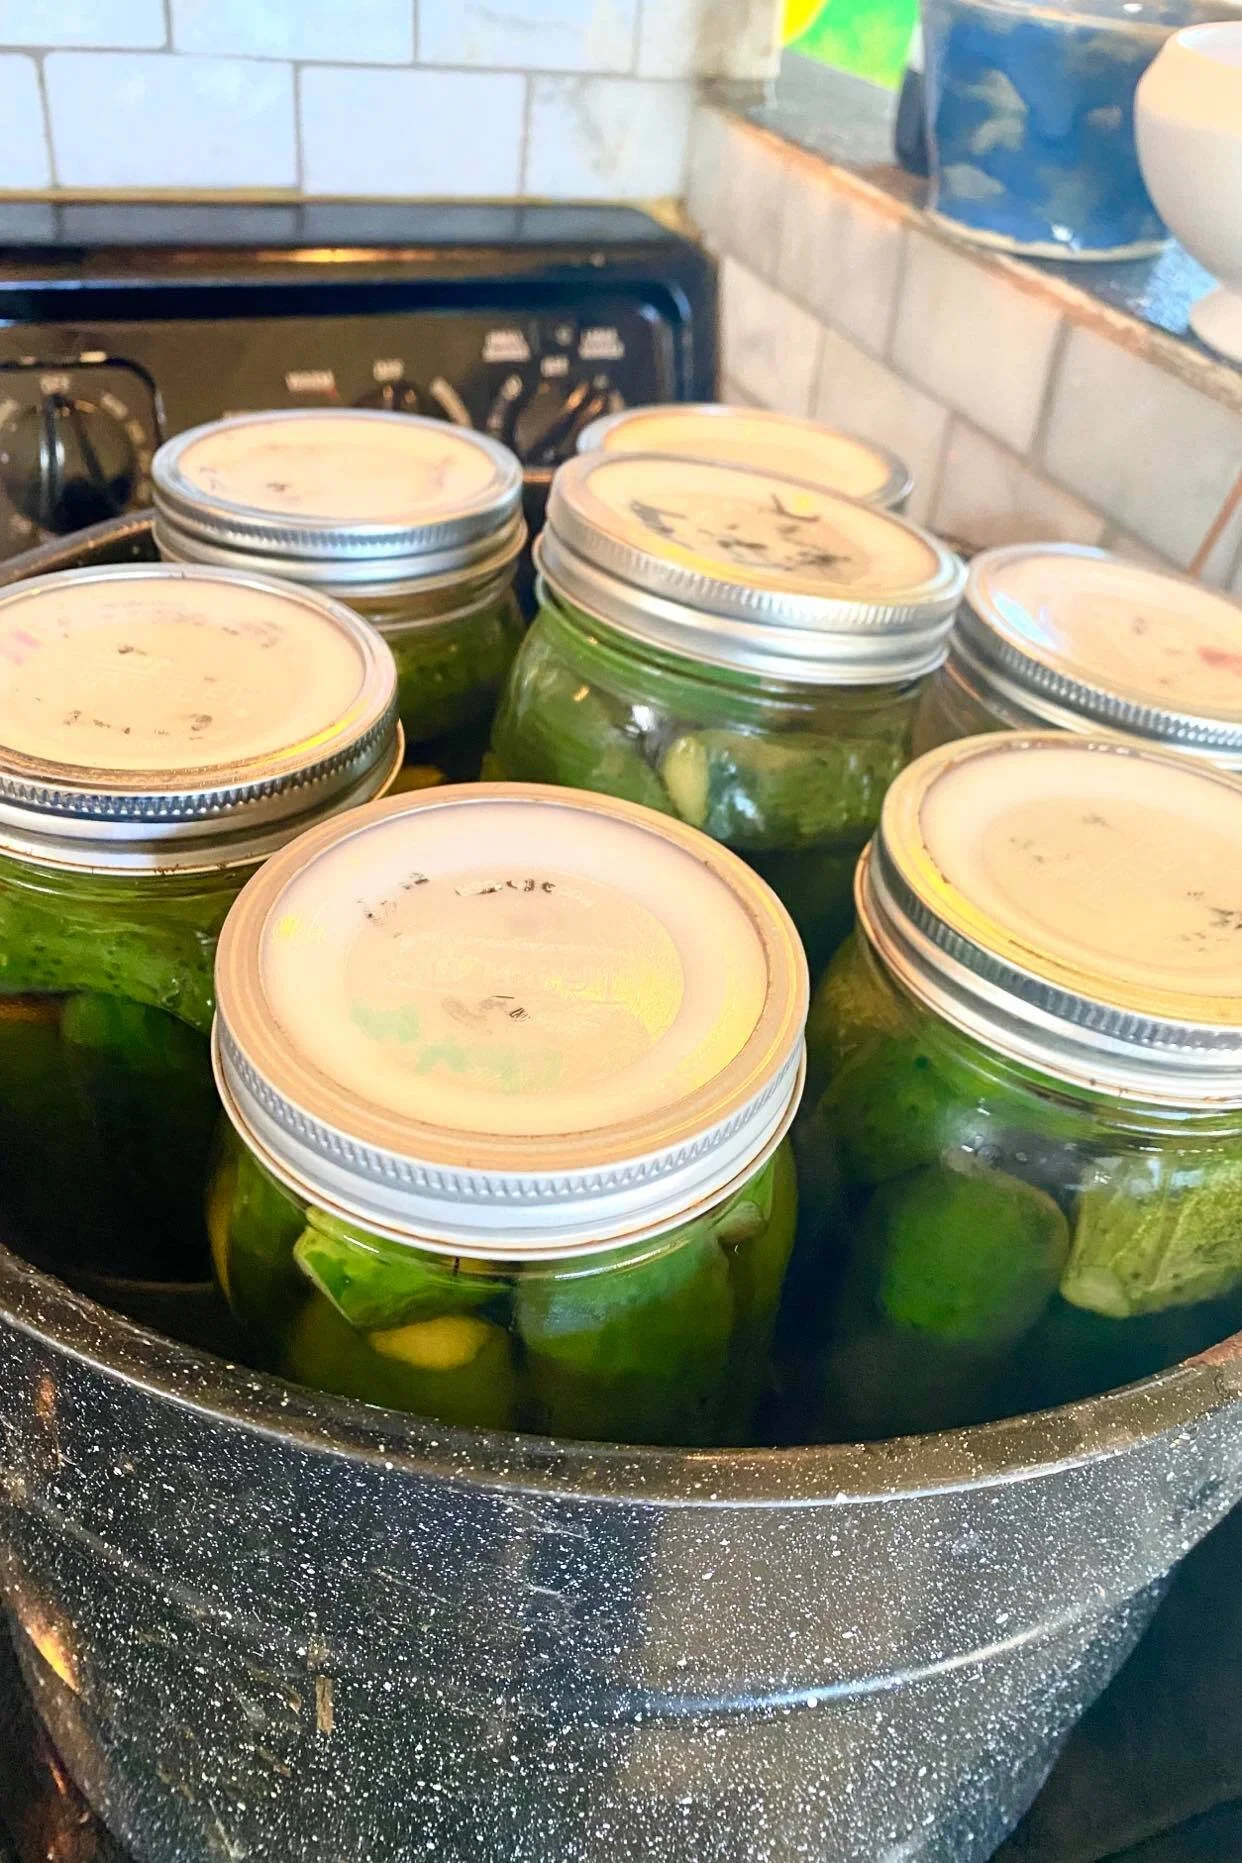
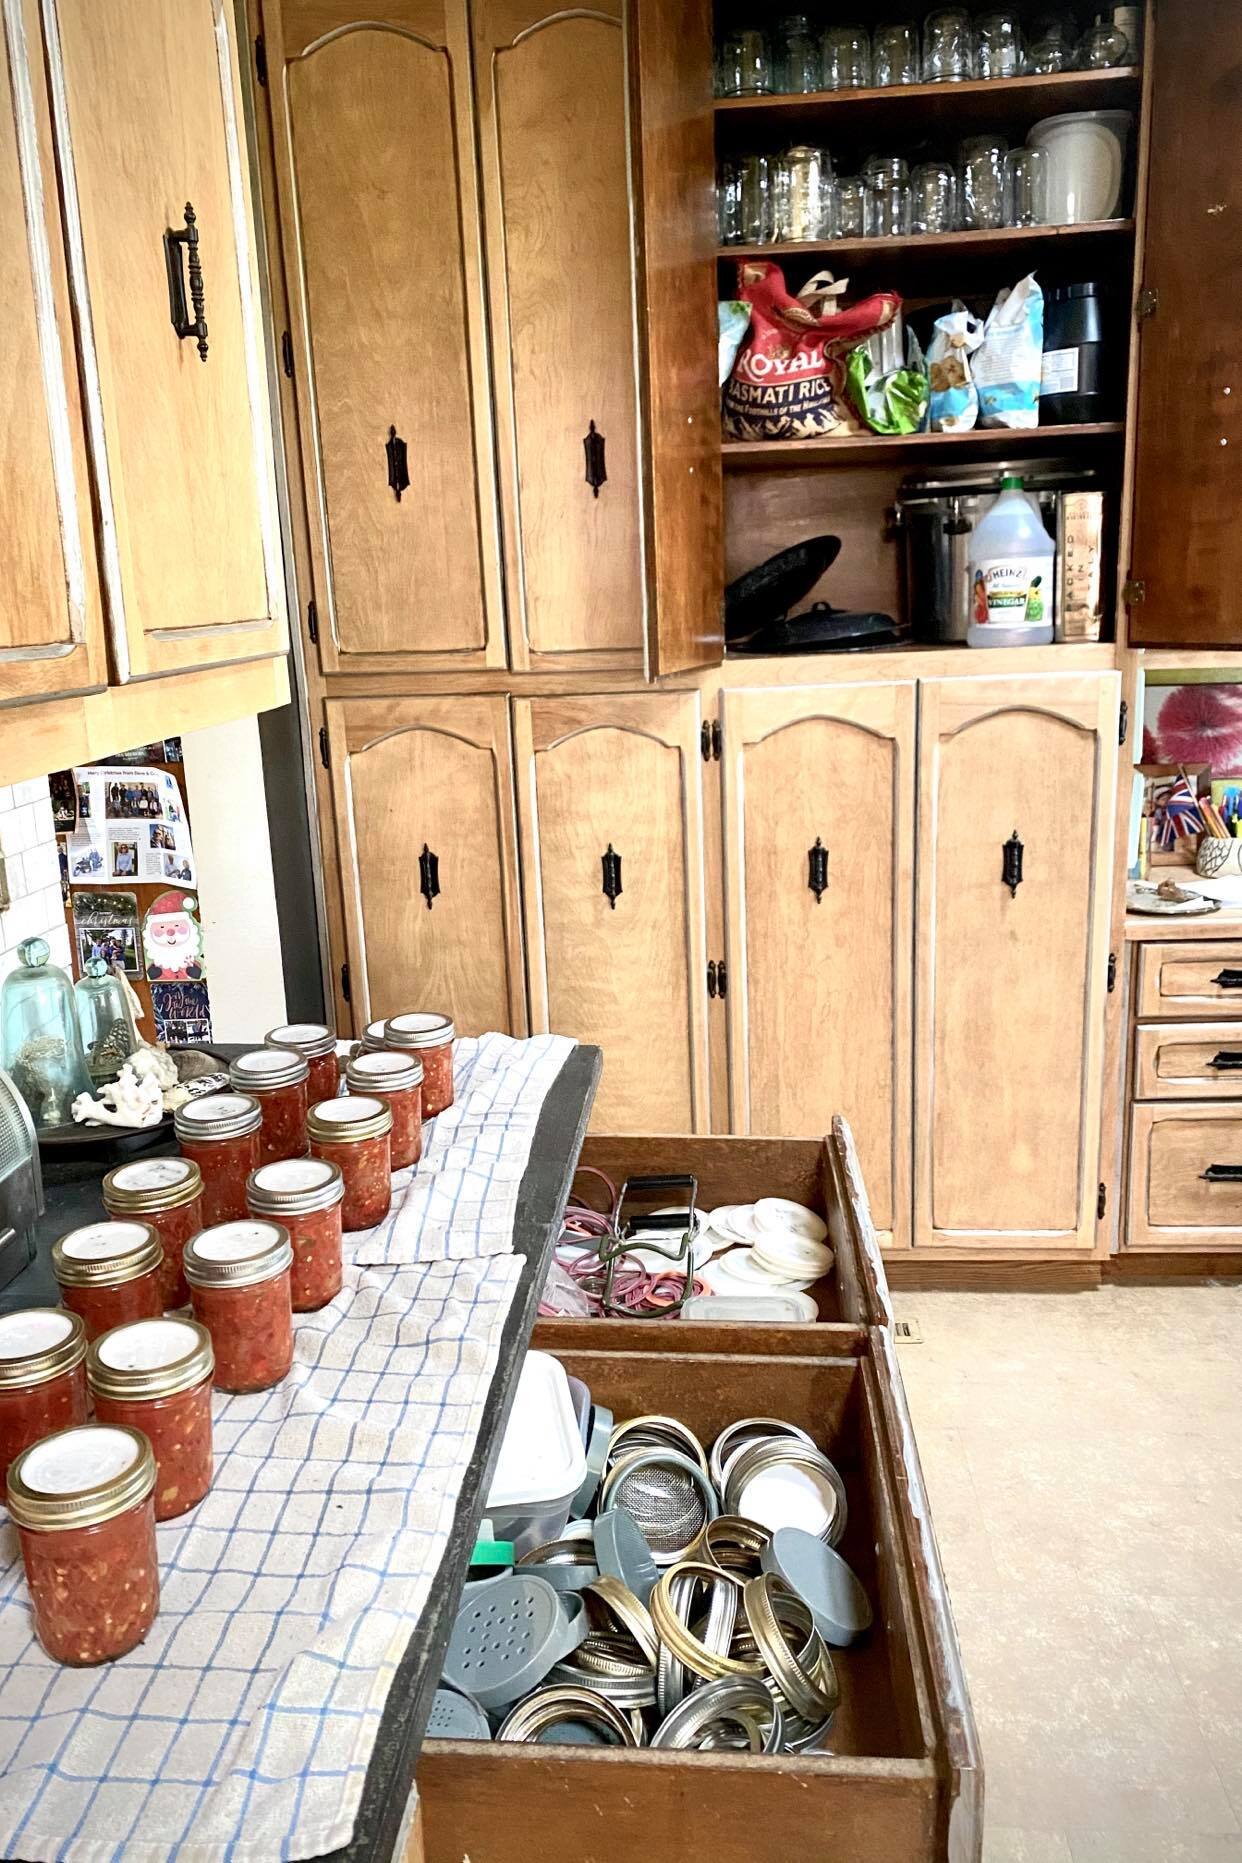
There is nothing like a pot of piping hot jars on the stove. These are evidence of hard work, abundance, the provision of Nature, and the changing of the seasons.
Tip #1: Tips for timing your canning process effectively
This is the part I have most often gotten wrong over the years, and the part which, if you get it right, will take HOURS off of your canning project.
I time all of my canning projects to the dishwasher. Yes. The dishwasher. Why? Because I sanitize all of my jars in the dishwasher. And you want your jars to be HOT when you put your food into them.
Here is what I do. I get my jars into the dishwasher and start it. For me, that gives me about 1.5 hours to get everything else ready.
Next, I get my water bath pot filled with water and on the stove on high. It can take a long time to heat the water bath, so this is an important step to take. If you have a gas stove, this may take you less time.
Next, you will get your food material ready. If it is pickles, then this is when I am going to scrub them and trim the ends off. This is also when I will chop my onions, mince my garlic, and prepare my dill.

Pickles is probably the easiest canning project to start with. You should have plenty of time to get your pickles and jar stuffings ready while you wait for your jars to sanitize and your water bath to boil.
Next, make your brine. BONUS TIP here: Always make double what your recipe calls for. You don’t want to get to your last few jars and have to stop to make more brine. The brine will usually keep in the fridge for future projects this season, and any left overs you would need to toss out don’t amount to more than a few cents of investment.
By now the water bath should be close to boiling or at a boil. Turn it down to medium high heat.
Next you will need to get your lids (and seals if using) sanitized in a separate pot from your water bath and your brine. I also sanitize my tongs and my canning funnel in that same pot. This should take no more than a few minutes. Make sure you turn this burner off when you are done as it can damage lid seals if they have to stay in boiling water an excess amount of time.
If you are making pickles, your jars should be just about ready to stuff. Stuff them. Stuff them fully. Leave no space that isn’t necessary to leave. Get athletic. This will ensure that you won’t need extra brine and more jars later.
From here everything should be ready to go. Keep all of your stuffed jars right next to the stove where they will stay warm. Fill with brine, clean the rims, fit the lids and rings, and put them immediately into your canner. I like to lift the canning rack out of the water and fill it with all of my jars, and then lower the whole kit-and-caboodle into the water.
BONUS TIP—always make sure your jars and all of your food material stay hot. Cold jars can crack and break in your water bath. True story.
I did a fun vlog a few years back about Canning Mistakes to Avoid with my mom, who is an expert. Check it out here.
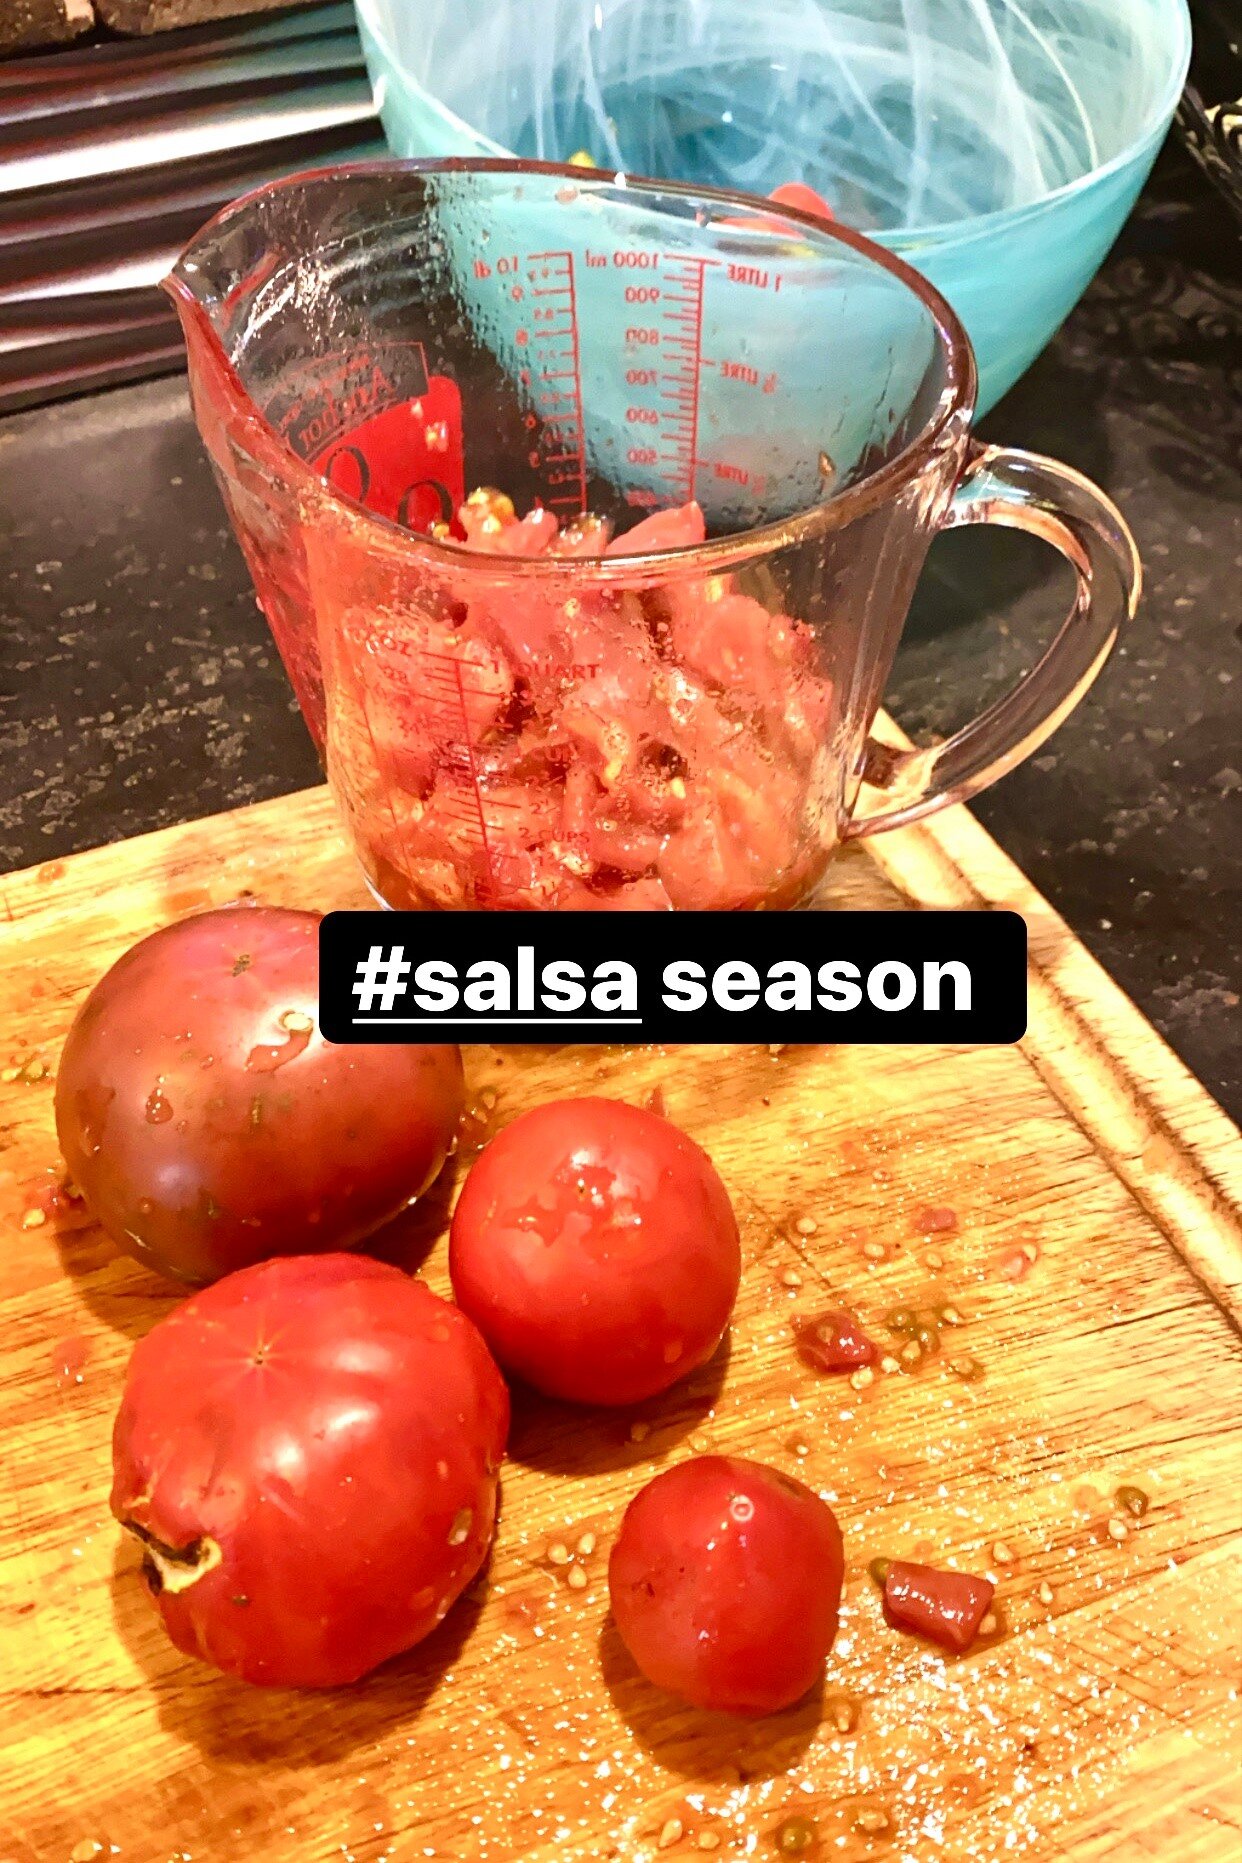
IF YOU ARE CANNING TOMATOES—SALSA, SAUCE, ETC…
There are some extra things to know about timing with these projects. When it comes to tomatoes, I may choose to do my canning project over two days. For salsa, the night before, myself and LW will do all of the chopping (which can take at least an hour). I put all of the chopped material for the salsa into the pot in which I plan to boil it, and I put it in the refrigerator until the next day. Then, when I start sanitizing my jars, I put the pot on the stove to cook down according to the directions.
If I am doing spaghetti sauce or tomato juice—really any project that requires removal of tomato seeds and skins, I usually break this down into two days as well. In our family we use a special tool (see about tools below) called a Squeezo that easily removes the unwanted tomato parts. So in this case, the first afternoon I will wash and cook down my tomatoes and send them through the Squeezo. I put the juice and pulp and any other ingredients into the pot I plan to boil it in for canning and then put in the fridge. Then, same as for salsa, the next day I simply put that pot on the stove to boil when I start sterilizing my jars.
Timing your projects can help make the finished project so much sweeter and give you HOURS back in your day. Ninja level mastery of this would include using the delayed timer on your dishwasher to be done JUST as your are ready to begin your canning project when you wake up in the morning. Birds chirping—sun shining, and voila! Sanitized jars all ready for your food products.
Tip #2: Essential tools for successful home canning
I talk with other home canners frequently, and I am often struck by how some people try to get along without all the tools that are truly needed for the job. On the other hand, some folks think they need to have every single gadget, and that, too, can be a waste of money and space. I feel like I have found the sweet spot with this, and here are the tools that save me time, keep me safe, and that I refuse to live without.
1) Tattler Reusable Canning Lids. Yes. There are some lids that are safe to reuse in canning. But not the metal ones you buy at the grocery store. That can be dangerous. What I love about the Tattler lids is that they are made of BPA-free plastic, are dishwasher safe, and can be used for the rest of your life. It does take a bit of getting used to if you are used to the typical throw-away lids that make the satisfying “pop” sound when they seal. You are going to have to get over not hearing that anymore, because the Tattler lids don’t provide that satisfaction, but they do provide the knowledge that you are making better use of natural resources, contributing less to the landfill, and that you make the investment in the lids once, and you are done. I can’t live without them. Find them HERE: Wide Mouth and Regular.
Sidebar: Tattler lids don’t come with rings. However, I would encourage you NOT to store your canned goods with your rings. It can be hard on the rings, causing them to rust, and can also make you believe something is sealed when it, in fact, has lost its seal and is no longer safe for consumption.
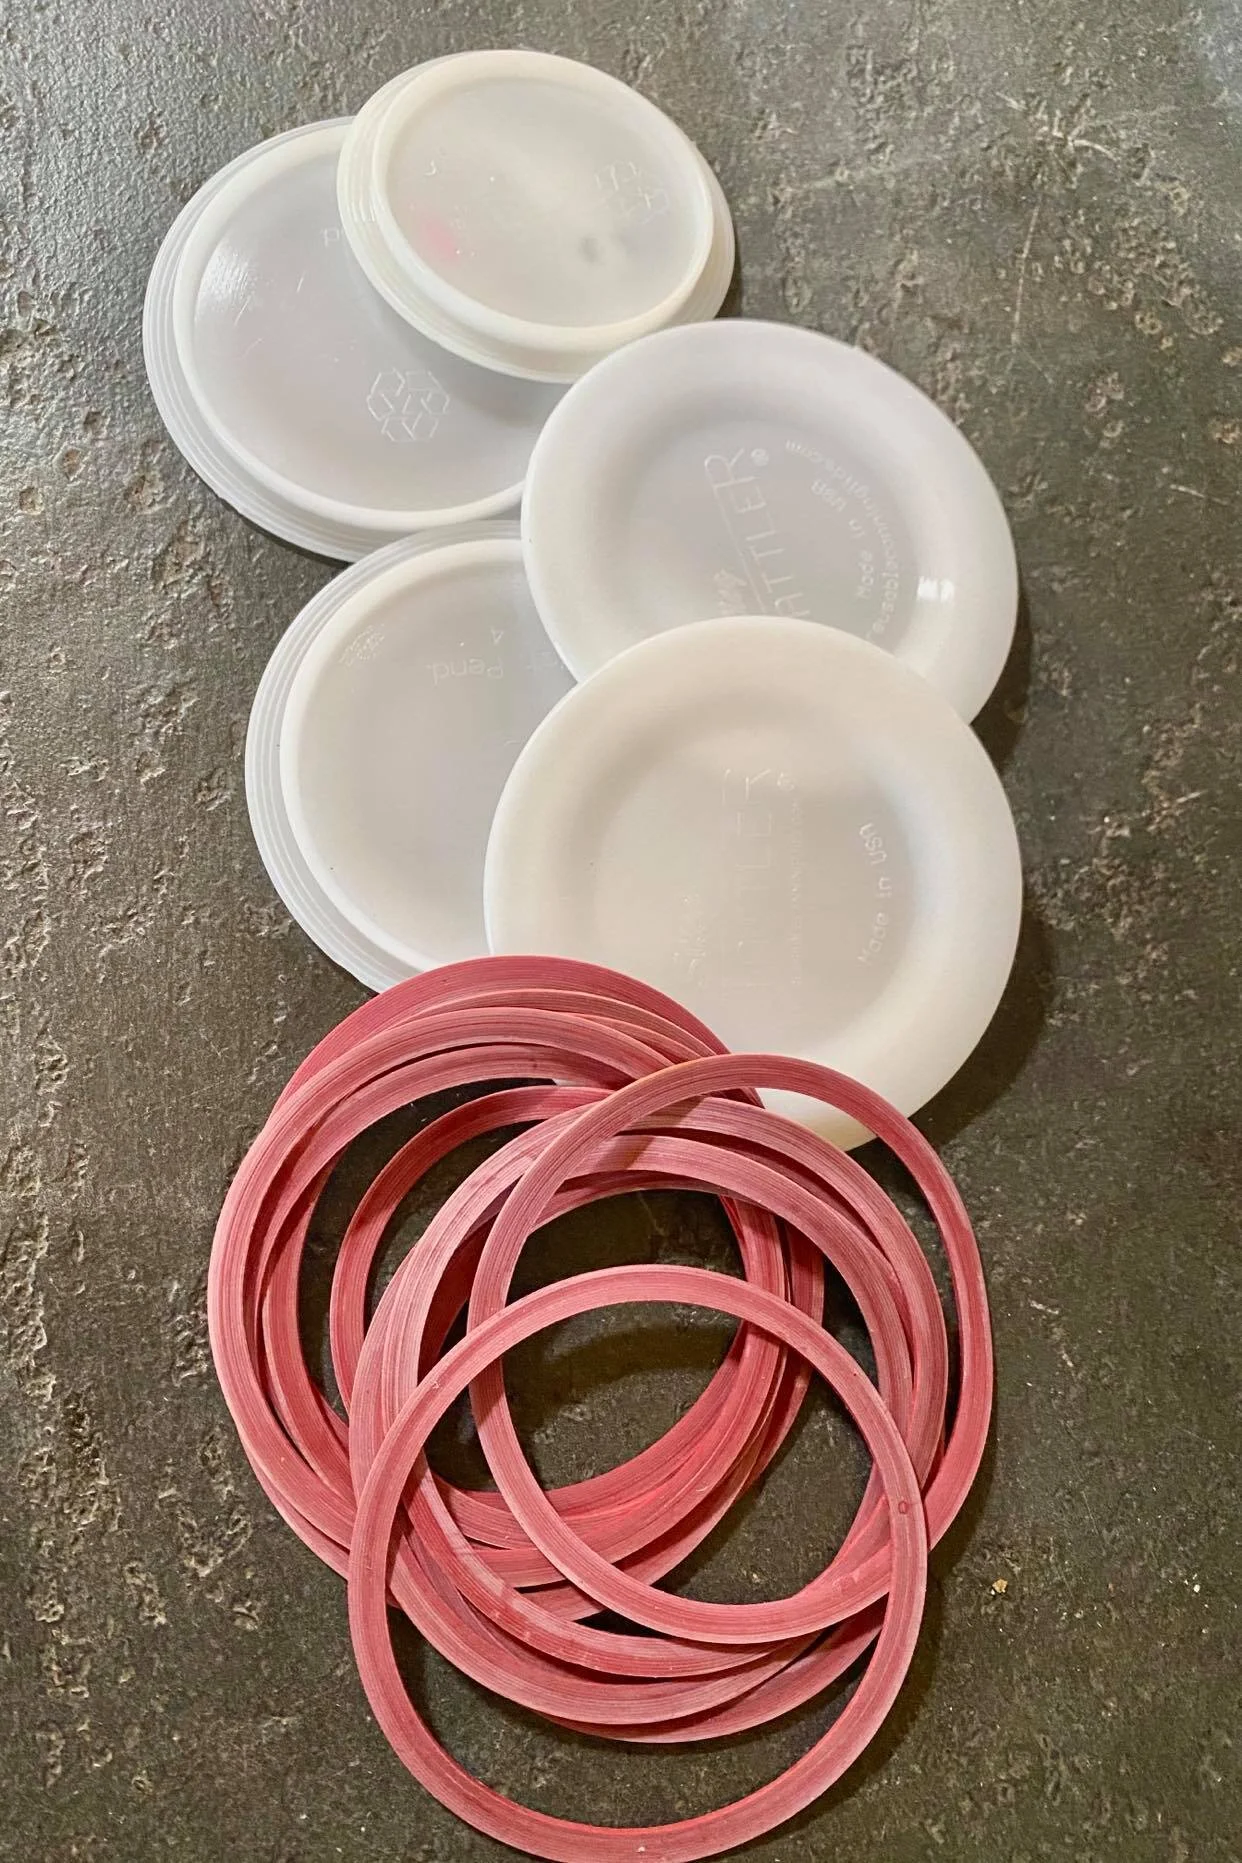
Here are the Tattler lids that I have been using for almost 10 years, that look as new as the day I bought them. I like to write on them with dry erase marker to mark the year the food was canned.
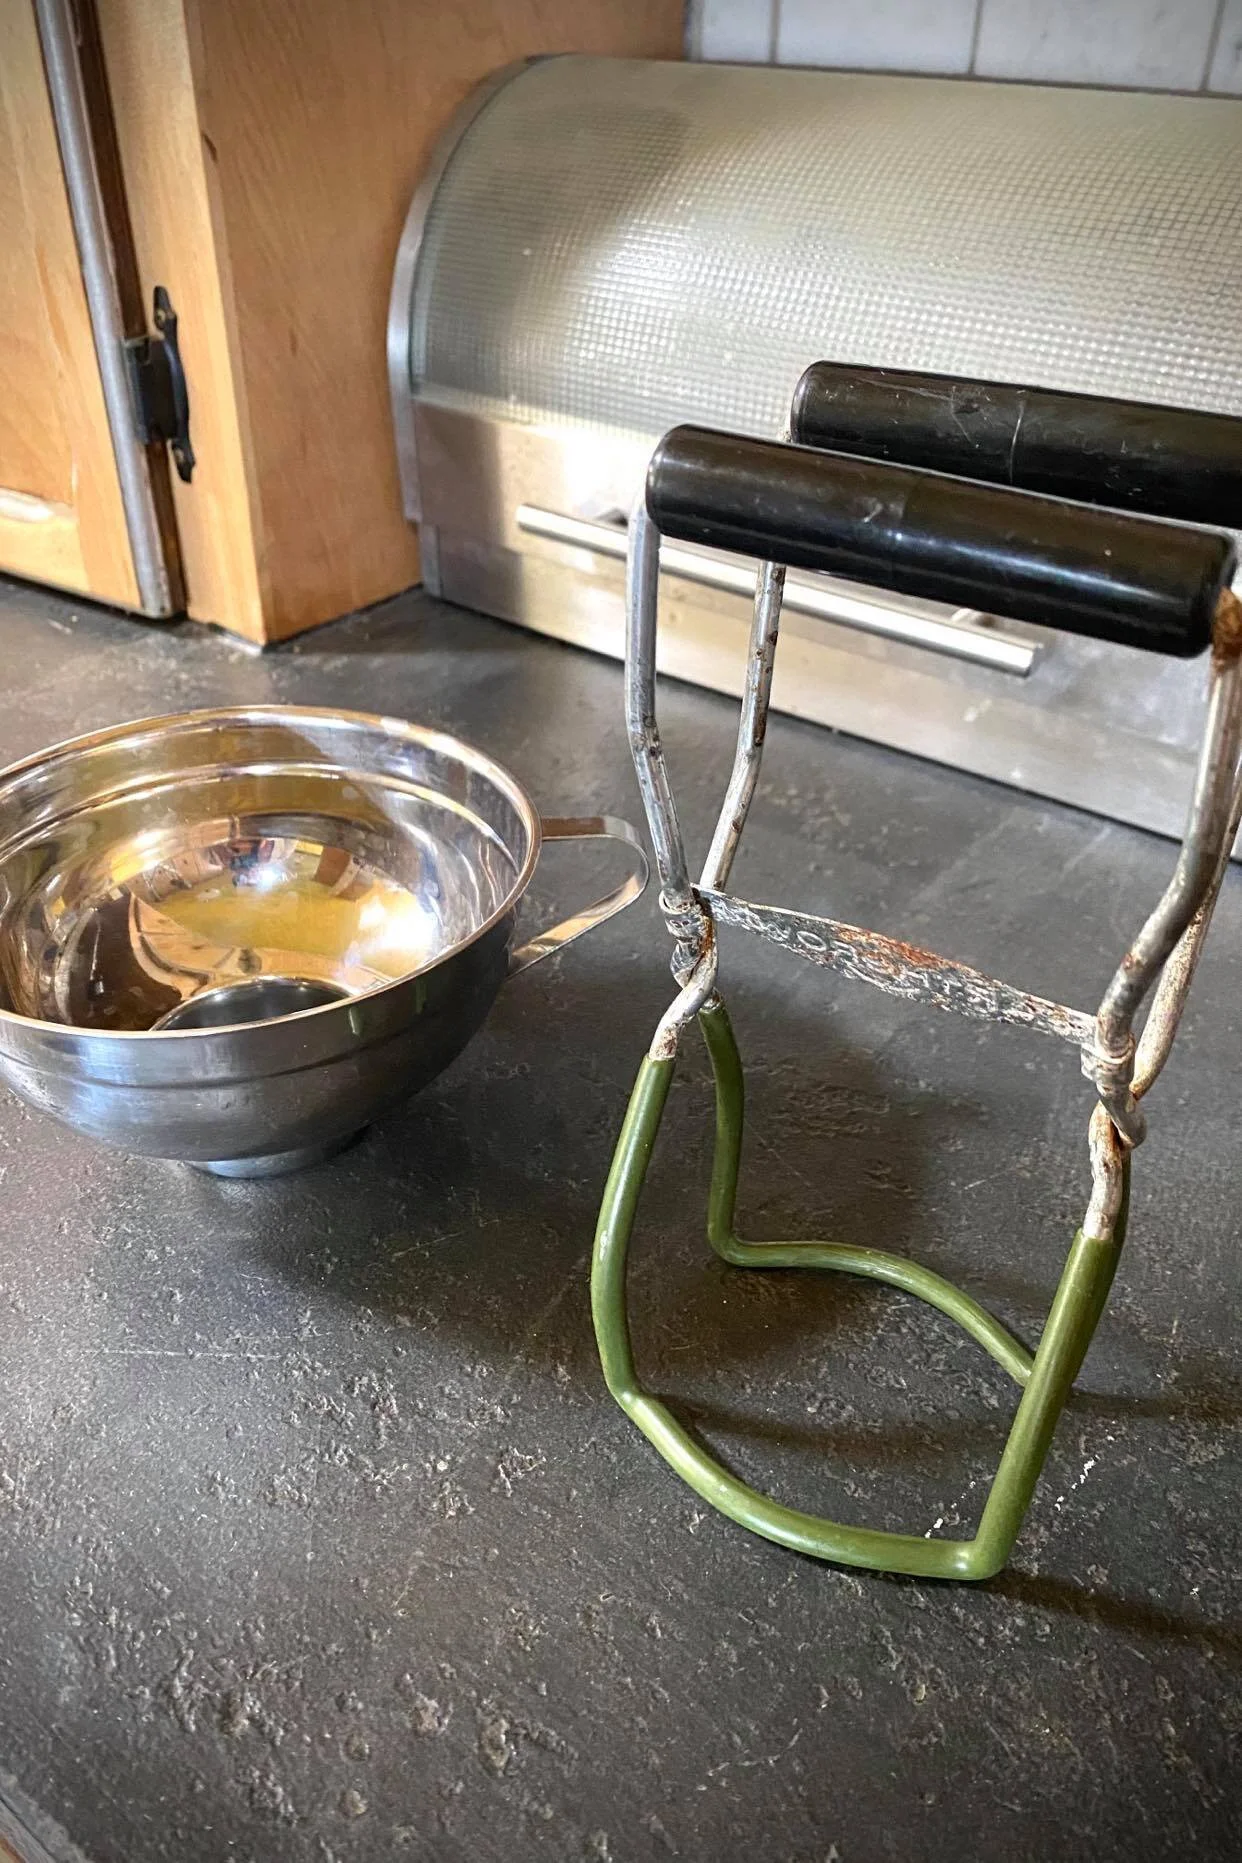
2) These are two very SIMPLE items that will help make your life so much easier. First, a canning funnel, and second, a jar lifter.
I am shocked by how many people who can don’t have either of these items. Why are you making it hard on yourself???!!!
The canning funnel makes it easier to keep your jar rims clean. Case closed. I really like this canning funnel set because it is metal, and because there is a regular mouth and a wide mouth sized. The regular mouth funnel doesn’t always work great for the wide mouth jars, depending on your project. It can be hard to gauge your headspace.
The jar lifter is how you can avoid scalding yourself when you are taking your jars out of the water bath. The vinyl on these do-jobbies helps keep a grip on that hot, steamy jar, so that it doesn’t drop back into the boiling water, or on your counter, or on your floor, or on you…you get the picture.
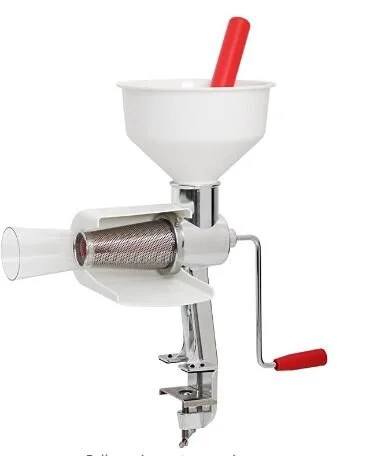
3) A Squeezo. AKA a food strainer. Seriously, how are you living without this item?!
You will seriously add what will feel like YEARS back onto your life by using this tool for some of your bigger canning projects. Please note that it does need different types of strainer attachments for different types of foods. This is simply because seed sizes differ.
I have used my food strainer for everything from jelly making to tomato sauce and juice. It’s versatile.
4). This is such a simple thing, but if you don’t know about it, you could end up with the wrong tool. Make sure that whatever canning rack you have for inside your water bath canner has a FLAT bottom. I have one that is flat and one that is rounded, and the round one gives me pains. The jars don’t stay upright in the water bath. It’s tedious and infuriating.
This rack specifically mentions that it has a flat bottom, so you should be good to go.
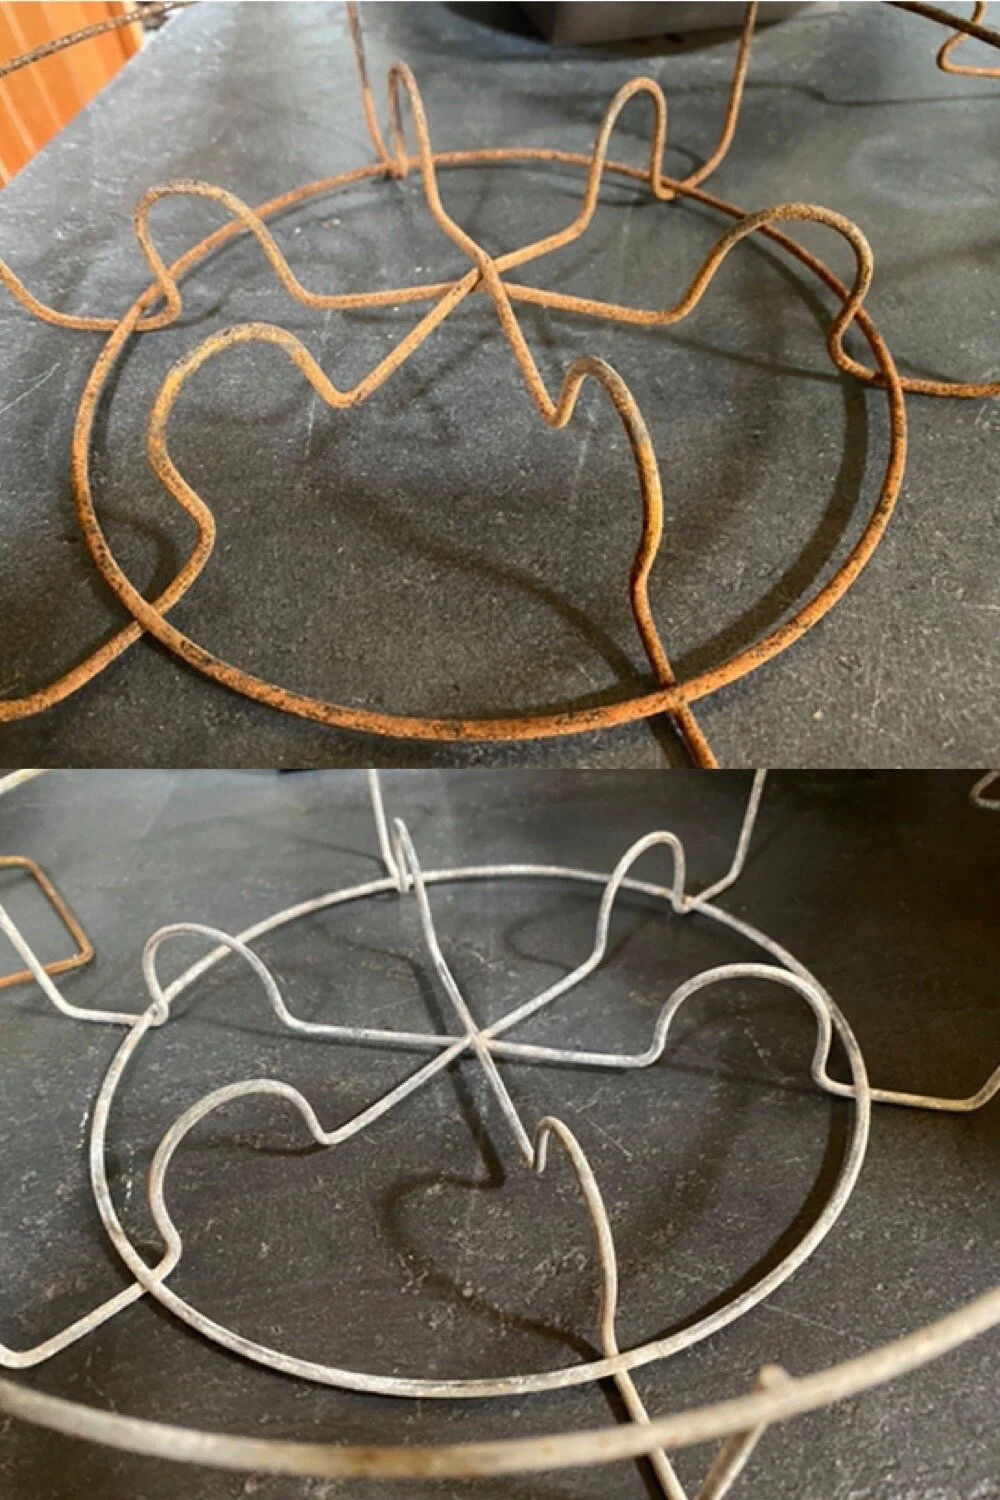
Here we can contrast the two styles of canning rack currently available on the market. The top one is the hated rack—the rounded bottom one. I hate it. Why do I keep it? In case something were to magically happen to my rack that I LOVE, the flat bottomed one, that is on the bottom of this photo.
Tip #3: Triangle--How to plan your space for efficient canning
I am sure most of you are aware of the design principle in kitchens called the Work Triangle. The idea of the work triangle is that you want your cook top, your refrigerator, and your work space, as well as your cooking materials, all within a few steps of each other. In other words, it would be very annoying to have your refrigerator clear across the kitchen from your cook top, and it would mean a lot of extra steps back and forth.
I like to extend this idea to our canning equipment, supplies, and storage. Now, I realize this may not be possible in every home—but can you think of ways you can get closer to this ideal? I have my lids and rings stored immediately below where I like to cool my jars after they come out of the water bath. Across from this is my storage for all of my water baths and pressure canners as well as my food strainer. Other canning tools like apple peelers could be stored here as well. And just below that is where I store all of my finished jars.
In other words, I created a canning triangle.
When we first moved into this house I had a romantic ideal about having a jar pantry in our basement that would have all of my beautiful jars lined up like the beautiful gems they are, and out of harms way in case of any Apocalypse.
It took only one canning season of trudging up and down the basement steps 1000 times to get jars, lids, rings, water baths, etc to change my mind.
I also found that I never knew where some of my crucial canning tools, like my jar lifter, were. Now they get stored right with my lids and rings.
I sacrificed some pantry space in my kitchen in order to save myself the pain of having to track down all of my canning stuff every time I do a project. It has been worth it. Completely.
So again, even though your kitchen space might be set up differently—I invite you to consider how—even in a small space—you could make your canning equipment storage and jar storage more efficient for you.
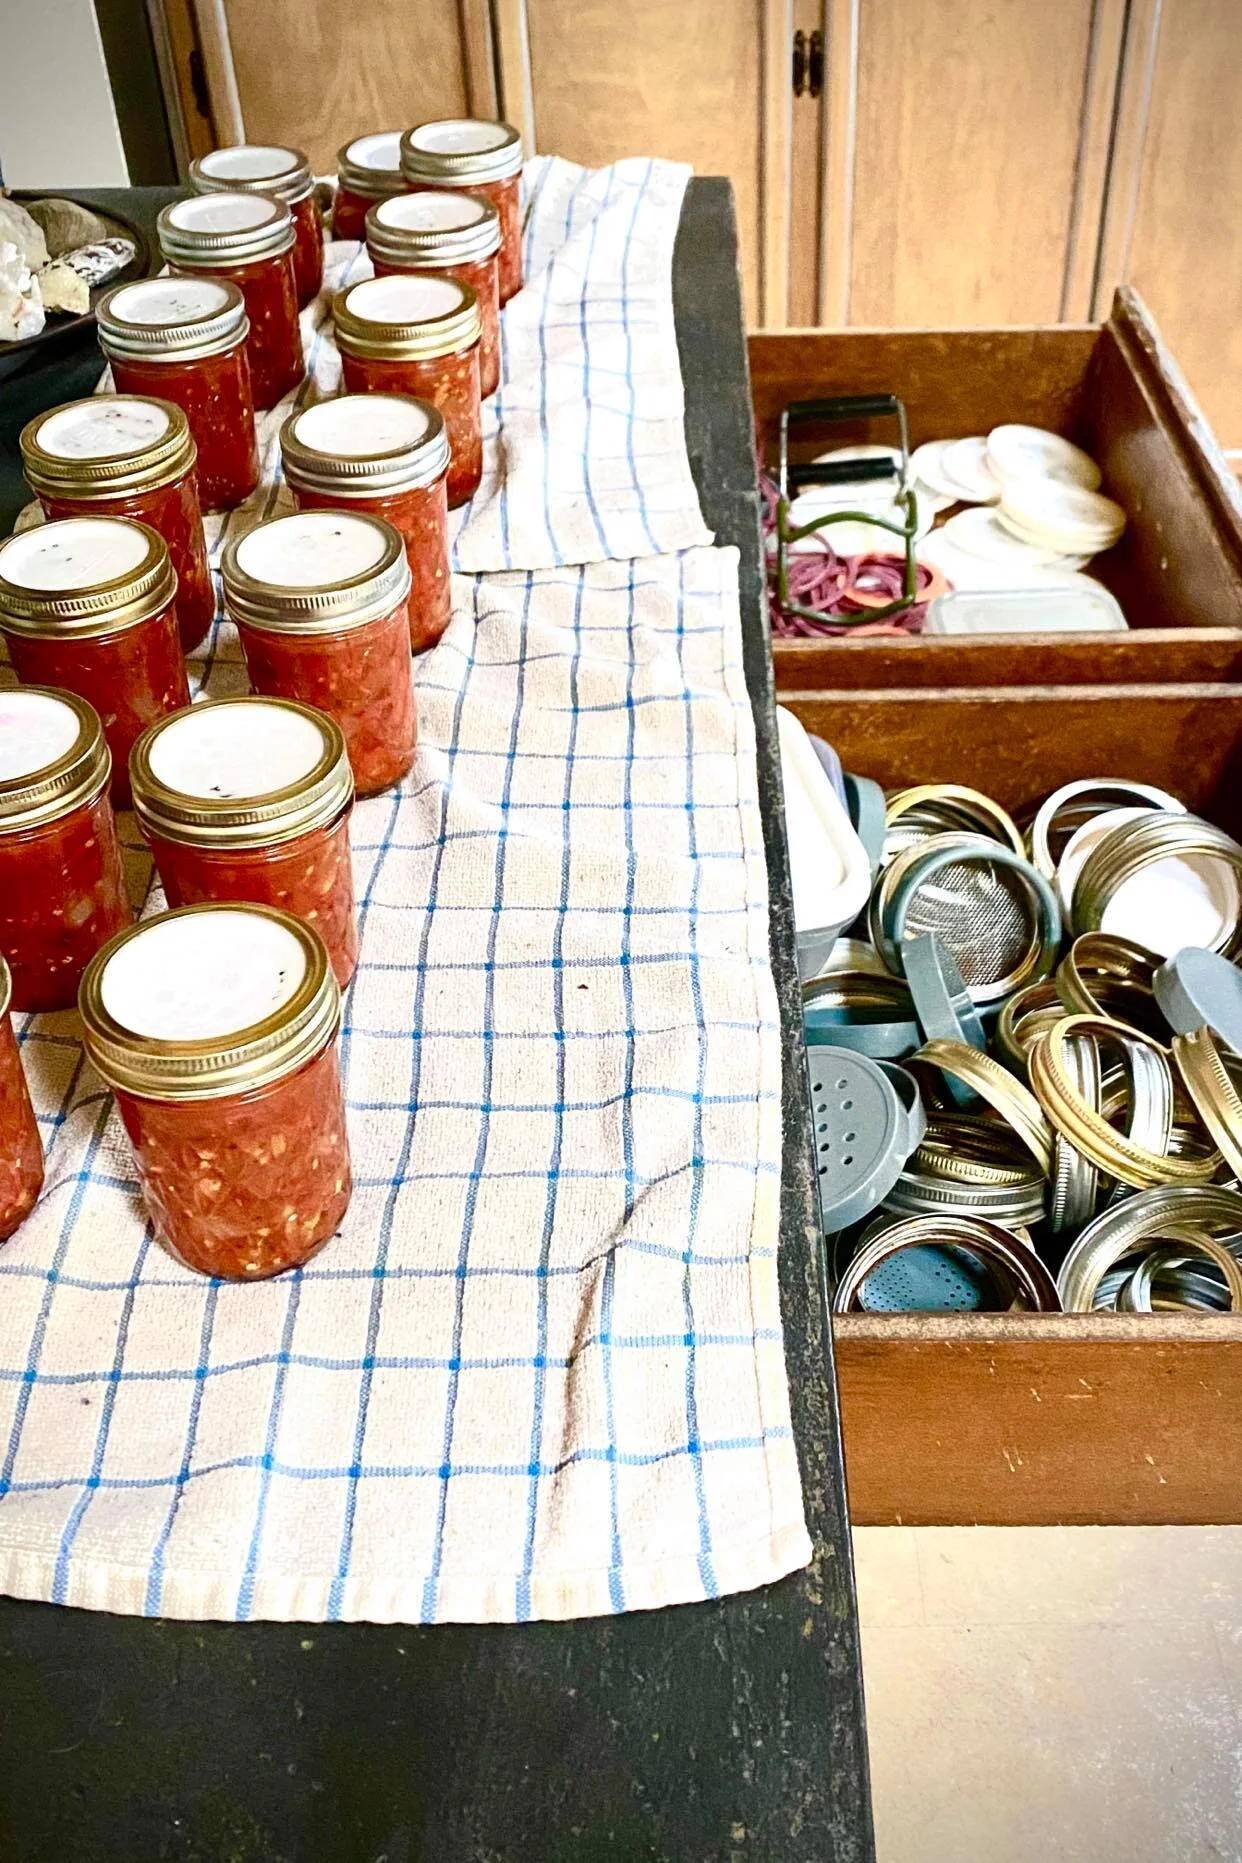
I store my lids and rings immediately below where I cool my jars.
And here is my “Canning Triangle.” Water bath storage is above, jar storage is below that (forgot to open that door), and my lids and rings and all of my utensils for canning are right across the way. This way, my cooled jars go immediately into their storage spot, and my water baths go straight from the sink into storage, all without a million trips up and down the stairs to the cellar.
Well, that’s all, folks. I hope this has been helpful, even if you are a seasoned canner. If you want to learn more about canning, or if you’d like to hear some “canning bloopers,” my mom and I just did a hilarious and informative podcast about canning that you can find on your podcast app or HERE. Just search for Episode 6 of the Holistic Ease Podcast.
And are your canning projects making you wistful for fall? Well they should—it is just around the corner. Learn how to live a more holistic lifestyle with ease during the Fall Session of the Eastern Medicine Academy.
Or, join us in the Rewild + Untame Community.
Not quiet ready for an exclusive cohort?
Join us in the Rewild and Untame community, where you become the priestess of your own body-temple, huntress of your own truth. Where ancient devotion meets modern science.
Build your Home Apothecary 101
Get your FREE Class
Toss your email in the blanks and receive this empowering course in your inbox in seconds.
Erin Oberlander, Certified Holistic Aromatherapist, herbalist, holistic health expert, and sound practitioner
Live a holistic lifestyle with ease. Erin Oberlander is a Doctor of Musical Arts, a Certified Holistic Aromatherapist, herbalist, holistic health expert, sound practitioner, and permaculturalist . She has been working with essential oils, herbs, and other healing arts, on a regular basis for the past 20 years as owner of her company Prairie Soap House & Apothecary. She helps others live healthier lives through connection with Nature, themselves, and the Divine. Check out all of the course offerings at Arcadia Holistic School or get yourself an online sound bath & holistic hacks subscription with Arcadia Members Collective.